

Introduction
This article about easy it to
make an Azure Active Directory (Azure AD) application with
enabling the service principal that will be used with the role-based access
control.
Currently, technology people work
in the Azure cloud, and that we attempt to keep our secrets secret. To
accomplish that, we use Azure Key Vault, which allows access to the internals
only to pre-defined Azure Active Directory identities. Things sound very
simple:
· Need to associate your piece of code with Azure Active Directory Identity
· Setup Key Vault to permit this Identity to access secrets.
· Done
Azure Active Directory (Azure AD) application:
Microsoft offers a strong identity
platform but needs to have to do authentication and authorization applications
got to be registered. Thither end, within Azure Active Directory (AD), will
find out the App registration option that gives to make the registrations for
new applications and assign permissions also accordingly. Need to establish
connectivity between the application and platform.
You can control:
Supported Account Types –
used by users during a given organizational directory or personal Microsoft
accounts to be used also.
Redirect Settings – the app must have the access token returned to a selected URI to process subsequent
steps of authentication and authorization.
Certificates and Secrets –
need to verify the application connecting to the Azure platform can try too so.
Permissions.
Application registration
Application registration may be a
process of adding a replacement non-human Identity to AD. It results in the
creation of two objects in an Azure AD tenant:
·
An application object.
·
A service principal object
One and Only the application
object is equal in the Azure AD Application is clear. The thing resides within
the Azure AD tenant, where the appliance was registered, referred to as the
application’s “home” tenant.
Service principal:
The Service principal: made each
tenant for the application (used globally particular app). The service
principal object defines what the app can neutralize the precise tenant, who
can access the app.
Assigned only enough access to as
little as a selected single Azure resource into Azure service principal.
Ex: Role-based access to a whole
subscription when creating an Azure service principal or Azure virtual machine
only one.
You can be able to access
resources that are secured by an Azure AD tenant (for ex, components >>
Azure Subscription), and the entity must be represented by a security
principal, which Azure names Service Principal.
Application ID and App. reg Name
are associated with Service Principal.
Azure AD permissions
Login to your Azure portal with your account.
Select and open Azure Active
Directory.

Note your role, if don't have a user role, you cannot be able to connect App registration. So, need to create a user role setting.

Before creating the App, need to verify the Azure subscription permissions.

Azure
subscription permissions
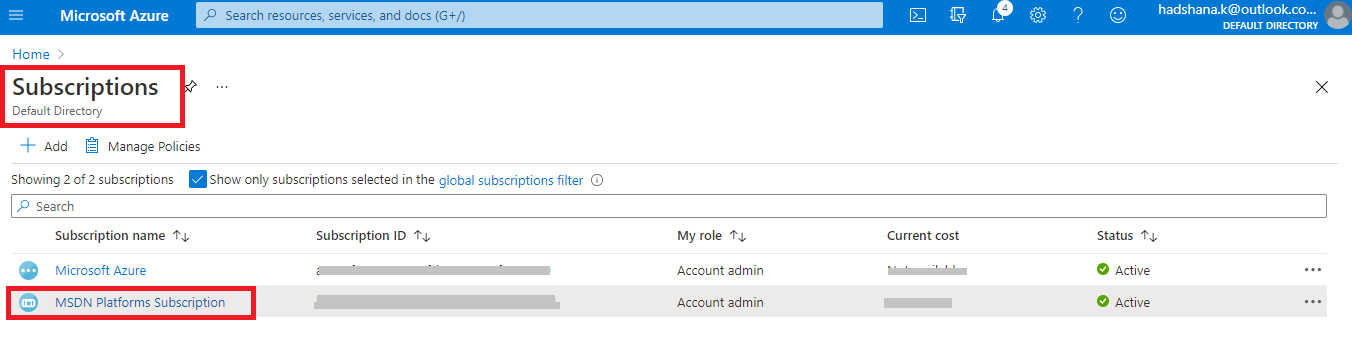
Search and select Azure subscription and open the homepage.
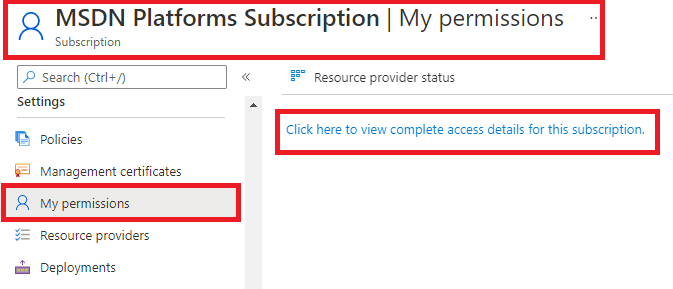
Select
the subscription for you want to need to create the service principal.

After that, Select the My permissions option. Then Select and open
the "Click here to view complete access details for this
subscription." Option.
After that, Select View in the Role assignments >>
View assigned roles >> to assign the role to the AD app. Add to User Access
Administrator role.
Then, the user assigned the owner role.

Create
Azure AD with an application and create Service Principal (SP)
Select and Open Azure Active Directory.
Select and open the App registrations option.
Select
and open New registration.

After that, Enter >> application
Name.
Then, Select >> supported
account types.
Next, Under Redirect URI >>
select Web for the type of application >> want to create.
And Enter the URL (Where the access
token is sent)
Then, after the entered value
>> Click the Register option.

“Finally,
successfully created Azure AD application and service principal.”
Assign a
role to the application (Access control (IAM))
Select Azure subscription and open the homepage.
Select the particular subscription.
Select Access Control (IAM)
Select >> Add role
assignment.
Then, Select the role you wish to
assign to access the application.
And Select >> created
Application.
After that, Click the Save option.

You can be able to see the result. (Contributor)

Signing in
>> Tenant and app ID values
Select Azure Active Directory.
Select and Open >> App registrations >> Select you created an Application.

After, open the application >> Copy the Directory (tenant) ID and store it in your application code.
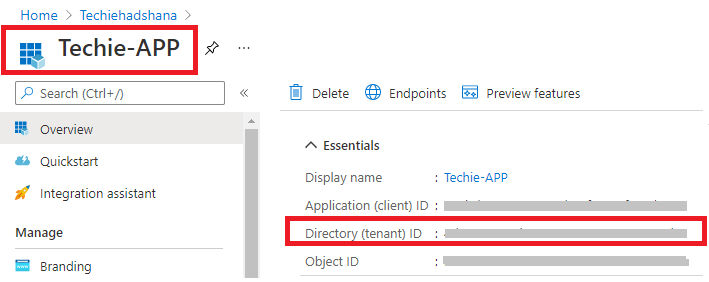
And, Copy >> Application ID and store it in your application code. (It will help to connect the other platform service.)

Authentication
(Two options)
Op.1
>> Upload a certificate.
You can apply >> create a self-signed certificate or
use an existing certificate.
After that, export the certificate.
Open Run from the Start menu >> enter certmgr.msc

Select under the Personal directory.

And Select >> created Certificate >> Right-click
>> select all task >> Export.

Do not need to export the private key >> export to
.CER file.

Exported certificate.

Upload the
certificate >>
Select Azure Active Directory.
Select and Open >> App registrations >> Select
you created an Application.
Select and open >> Certificates & secrets.
Then, select >> Upload certificate >> select the certificate (exported.)

After that, view the upload certificate.

Op.2
>> Create (New) Application Secret
Select Azure Active Directory.
Select and Open >> App registrations >> Select
you created an Application.
Select and open >> Certificates & secrets.
Then, Select Client secrets >> New client secret

Enter >> details (Secret) and >> add duration
>> Click Add.

After that, you can see the Client's secrets details.

Summary:
During this article, How to create Azure AD application with a Service
Principal in the Azure Environment in my next article, I will cover the next
step of this series (How to connect another platform).
0 Comments