

The Azure application gateway is
the feature that directs the application web traffic to specific resources in a
backend pool. We can assign listeners to ports, create rules, and add resources
to a backend pool.
This article will learn how to
configure Azure application gateway and use a simple setup with a public
front-end IP, a primary listener to host a single site on the application
gateway, a basic request routing rule, and two virtual machines in the backend
pool.
In this demo I have already created the following instances:
·
Virtual Network (Blog-VNet)
o
Subnet1 (BackendPool) for Virtual machines
o
Subnet 2 (AppPool) for Application Gateway
·
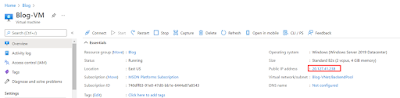
Virtual Machine (Blog-VM) with IIS service
Create an
application gateway
On the Azure Portal page, in Search resources, enter the application gateway, select Application Gateway, and click Create.

In the Basics tab, enter the following information.
·
Resource group: select the correct Resource group that we have already
deployed the instances.
·
Virtual Network: Select the existing
Virtual Network
·
Subnet: Select the empty Subnet
Click Next: Frontends to configure the frontends.

·
Frontend IP type: Public
·
Public IP address: Create a New Public IP address
Click Next: Backends to configure the Backends

In the Backends tab, enter the following information:
·
Click Add a backend pool
·
Enter the Name for the backend pool
·
Target type: Virtual machine
·
Target: Select the existing Virtual Machine
Click Add button, and then click Next: Configuration.

In the Configuration tab, Frontends and the Backend pools are already configured; we had configured in previously, now we need to add the Routing rules.

Click Add a routing rule to configure the routing.
·
Rule Name: Blog-Rule
·
Listener name: Blog-Listener
·
Frontend IP: Public
Click Backend targets.

In the Backend targets, select the Backend target and in the
HTTP, settings click Add new.


After completing this process click Create + review
and Click Create.
For Testing, whether the Web service is running on the
Virtual Machine’s Public IP, copy the Public IP and paste it to the web
browser.
The Landing page has loaded using the Virtual Machine’s
Public IP address.

Open the Application gateway and copy the Frontend public IP address and paste it into the web browser.

The Landing page has loaded using the Application Gateway’s Public IP address.

Summary
In this article, I showed you how to configure an Azure
Application Gateway.
0 Comments